In today’s hyper-connected digital ecosystem, data creation occurs at an unprecedented rate. From high-resolution 4K smartphone photography and ProRes video recordings to massive system backups and extensive personal document archives, the average internet user generates hundreds of gigabytes of data every single year. For over a decade, big tech cloud platforms like Google Drive, Apple iCloud, Dropbox, and Microsoft OneDrive served as the default solution for our ever-expanding digital storage needs.
Initially, these platforms lured consumers in with generous free storage tiers. However, as file sizes ballooned, those initial free allocations—such as Google Drive’s standard 15GB shared across Gmail, Photos, and Drive—became dramatically inadequate. The response from tech conglomerates was straightforward: transition users into recurring monthly subscription models.
What begins as a seemingly modest $1.99 or $2.99 monthly bill for 100GB to 200GB quickly escalates. As your digital footprint expands over a lifetime, you are forced into higher tiers costing $9.99, $19.99, or more every month. Over a decade, a single individual can easily spend thousands of dollars merely renting server space from third-party corporations.
The core issue of cloud subscriptions is simple: you never actually own the storage. The moment you stop paying, your access is revoked, and your precious memories or critical business files are held hostage behind a paywall.
Fortunately, an increasingly popular, cost-effective, and empowering alternative exists: learning how to build your own home cloud server using Network Attached Storage (NAS) architecture. By utilizing low-power, single-board computers like the Raspberry Pi paired with high-capacity external drives, you can establish a private cloud server right inside your living room—eliminating recurring monthly fees permanently while regaining absolute control over your private data.
The Core Advantages When You Build Your Own Home Cloud
Shifting from public cloud vendors to a self-hosted home server offers substantial benefits that go far beyond simple cost savings.
1. Financial Freedom & Lifetime Return on Investment
The primary driver to build your own home cloud is financial sustainability. When you purchase hardware—such as a $60–$80 single-board computer and a $100 high-capacity external hard drive—you are making a one-time capital investment. Once your system is configured, storing 4TB, 8TB, or even 16TB of data incurs zero monthly subscription costs. Within 12 to 18 months, the hardware completely pays for itself compared to premium cloud subscription plans, yielding a 100% return on investment for years to come.
2. Uncompromising Privacy and Data Sovereignty
When you upload personal photographs, financial documents, or intellectual property to commercial cloud providers, your data resides on foreign data centers subject to corporate scanning algorithms, targeted advertising profiles, terms-of-service changes, and potential security breaches. A DIY server keeps your data physically located inside your own home. No algorithms scan your documents, and no third-party entity can arbitrarily alter access terms or revoke your account.
3. Unlimited Local Network Performance
Uploading multi-gigabyte video files or restoring system backups over an internet connection is bounded by your Internet Service Provider’s (ISP) upload speed—which is frequently throttled by commercial providers. Conversely, transferring files to a local server over a Gigabit Wi-Fi or Ethernet network operates at local hardware speeds. File transfers that take hours over the public internet complete in a matter of seconds across a local network.
4. Customizability and Scalability
Public cloud providers dictate rigid tier limits (e.g., jumping directly from 200GB to 2TB). With a self-hosted solution, scalability is entirely modular. If you run out of space, you simply plug in an additional external hard drive or upgrade your storage disks without needing to renegotiate subscription contracts.
Understanding the Architecture: How a Private Server Works
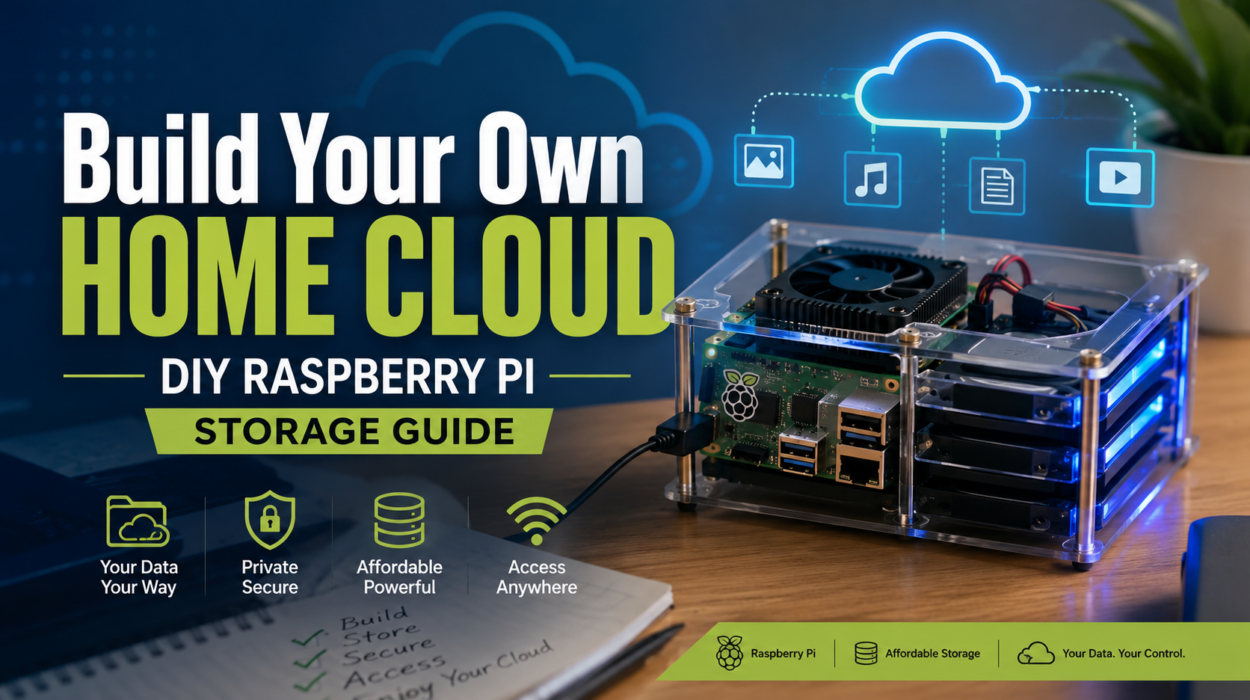
To effectively build your own home cloud, it helps to understand the underlying architecture in simple terms. A home storage server is essentially a mini-computer acting as a dedicated network hub connected directly to your home router.
Key Components of a Home Cloud Setup
-
The Computing Module (The Brain):
You do not need a multi-thousand-dollar enterprise server rack to host your files. Compact, single-board computers like the Raspberry Pi 4 or Raspberry Pi 5 are ideal because they draw minimal electrical power (typically around 5 to 15 watts), produce virtually no noise, and offer sufficient CPU and RAM performance to handle multi-device file transfers seamlessly. Old desktop PCs or repurposed laptops can also serve as effective home servers.
-
Storage Media (The Muscle):
The core repository where your files physically reside. Depending on your storage targets, this can range from a budget-friendly external USB 3.0 Hard Disk Drive (HDD) or Solid State Drive (SSD) to specialized network-attached storage drives (such as Western Digital Red or Seagate IronWolf drives).
-
Operating System & Network Protocols (The Nervous System):
The server runs a lightweight Linux-based operating system (such as Raspberry Pi OS, Ubuntu Server, or OpenMediaVault). Network protocols like Samba (SMB) or NFS allow your server to communicate smoothly across different operating systems, making your home drive accessible simultaneously to Windows PCs, macOS MacBooks, iPhones, and Android devices.
-
Private Cloud Software (The Interface):
Platforms like Nextcloud or OwnCloud provide a polished graphical user interface similar to Google Drive or Dropbox. They offer mobile camera auto-upload features, document previews, contact syncing, and web-based file management accessible through any modern web browser.
Step-by-Step Overview: How to Build Your Own Home Cloud with Raspberry Pi
While setting up a home server requires a brief initial learning curve, modern open-source software has streamlined the setup process significantly. Here is an overview of the implementation journey:
Step 1: Gathering the Required Hardware
To construct a robust storage hub, compile the following basic hardware components:
-
Raspberry Pi 4 (4GB/8GB) or Raspberry Pi 5
-
High-grade MicroSD Card (32GB+) for the operating system installation
-
External Hard Drive or SSD (2TB to 8TB recommended)
-
Powered USB Hub (Optional, but recommended for large 3.5-inch external HDDs requiring stable power supply)
-
Cat6 Ethernet Cable for direct, low-latency connection to your Wi-Fi router
-
Official Raspberry Pi Power Supply
Step 2: Flashing the Operating System
Using tools like Raspberry Pi Imager, flash a headless or standard Linux operating system (such as Raspberry Pi OS 64-bit or OpenMediaVault) onto the MicroSD card. Enable SSH (Secure Shell) during setup to allow remote management from your primary computer.
Step 3: Formatting and Mounting Storage
Plug your external hard drive into one of the blue USB 3.0 ports on the Raspberry Pi for maximum transfer bandwidth. Log into the server terminal, format the drive to a stable file system like ext4 (for pure Linux environments) or NTFS/exFAT (for cross-platform flexibility), and configure auto-mounting so the drive reconnects automatically following any power restarts.
Step 4: Installing File Sharing Services (Samba)
Installing Samba transforms your hard drive into a network storage share. By defining user credentials and folder permissions in the configuration file (smb.conf), every computer connected to your home Wi-Fi network can view the drive directly in Windows File Explorer or macOS Finder as a native network drive.
Step 5: Setting Up Nextcloud for Smart Syncing
For users wanting a true Google Drive replacement with phone app synchronization, automated photo uploads, and web interfaces, install Nextcloud using Docker or snap packages. Nextcloud syncs seamlessly with iOS and Android devices, auto-backing up photos the moment you step foot inside your home Wi-Fi range.
Securing Your Server: Essential Best Practices
When you build your own home cloud, operating a private storage server requires paying attention to basic cybersecurity practices to protect your data against physical hardware failure or network vulnerabilities.
1. Implement a 3-2-1 Backup Strategy
Having all your files on a single local hard drive leaves you vulnerable to unexpected hardware failure. Always adhere to the industry-standard 3-2-1 Backup Rule:
-
Keep 3 total copies of your important data.
-
Store them across 2 different physical media types (e.g., internal storage + local NAS drive).
-
Keep 1 copy at an off-site location (e.g., an encrypted secondary drive stored at a family member’s home or an encrypted cold cloud backup).
2. Configure Redundancy with RAID or Drive Mirroring
Using software solutions like OpenMediaVault, you can configure two external hard drives in a RAID 1 (Mirroring) configuration. In a RAID 1 setup, every file saved to the primary drive is instantly duplicated to the secondary drive. If one hard drive fails mechanically, your server continues operating seamlessly without data loss.
3. Secure Remote Access (VPN vs. Port Forwarding)
If you need to access your home cloud files while traveling away from home, avoid exposing your home server ports directly to the public internet without proper security walls. Instead, set up a secure, private VPN server using modern tools like WireGuard or Tailscale. Tailscale creates an encrypted peer-to-peer tunnel connecting your phone or laptop directly to your home server from anywhere in the world without complex network modifications.
Also Read: Beyond the Model: The Definitive Guide to Robust AI Agent Tool Design
Home Cloud vs. Commercial Cloud: Comparison Table
To summarize the operational differences, consider how a decision to build your own home cloud measures up against commercial cloud providers:
| Feature / Criteria | Commercial Cloud (Google Drive, iCloud) | DIY Home Cloud (Raspberry Pi NAS) |
| Focus Keyword Strategy | Out-of-the-box vendor solution | Self-hosted customization |
| Long-Term Cost | High (Continuous recurring monthly fees) | Very Low (One-time initial hardware investment) |
| Data Control & Privacy | Low (Stored on vendor servers; subject to TOS) | Maximum (Physical ownership; total data privacy) |
| Transfer Speed | Limited by Internet Upload/Download speeds | Ultra-Fast (Gbps speeds over local LAN) |
| Storage Capacity | Tier-restricted; expensive to scale up | Highly expandable; attach bigger disks as needed |
| Maintenance | Zero (Handled by provider) | Minimal (Periodic software updates required) |
| Remote Access | Native out-of-the-box | Requires simple VPN configuration (e.g., Tailscale) |
Conclusion: Take Ownership of Your Digital Life
The era of defaulting to costly commercial cloud storage subscriptions is coming to an end. While platforms like Google Drive provided unmatched convenience during the early days of mobile technology, the long-term subscription costs, privacy compromises, and storage caps make commercial cloud storage less attractive for tech-savvy consumers today.
Choosing to build your own home cloud using a Raspberry Pi or repurposed hardware is an empowering project that yields immediate financial and operational benefits. By making a small one-time hardware investment, you take back full control of your personal files, eliminate monthly bills permanently, and build a scalable, privacy-focused storage hub tailored specifically to your needs.
It is time to stop renting server space from corporate tech giants—build your home cloud today and secure your digital independence!